Search This Blog

Wednesday, February 27, 2008

My cup runneth over...


In the hour before I went to bed last night and the hour since I've awoke, I've been riding on the roller-coaster of life. My life will quickly become more hectic than ever once the weather allows me to be working in the garden. So I've been trying to put some meat on the bones here, in other words, get lots of blogging work done.

Three things happened to me in these last few hours. The first was I achieved my first milestone with Blotanical. I hit my first goal of 500 user points which catapulted me to the next level, a "Patron Blotanist". Hooray, I know it sounds silly here but it allows me more freedom to reach people through this wonderful gardening bloggers community.

The next event came only minutes later. I was moderating some comments and I had been Flamed! Yes, I was flamed. I tell you, it took my breath away. Just to think about it, somebody had such strong feelings for me that they actually made the effort to flame me. I was shocked and flattered at the same time. Flattered? Well, nobody flames a nobody, so by flaming me, this flamer assured me that I am a somebody. Thanks anonymous poster for making my day! Sorry though that you can't seem to contain your jealousy a bit better, I'd send you a cheery photo to brighten up your life but you didn't leave me your name or address.

You too can share the heat of their ire by scrolling down to my "Take Back the Shed" post.


The third happening was waiting for me this morning. My message light at Blotanical was lit up and low and behold, I now have a red friendship star on my blog! Another Hooray, this means more exposure for me. And just think of it, now my secret flamer can get even more people to read their less-than-creative comment. Nothing like sharing the joy :-)

Crazy schedule today, I'll be back this evening with something new.

Cheers!

PS: I case you haven't figured it out yet, I don't believe in sulking and hiding in the corner when being bullied.

Monday, February 25, 2008

The Camera Doesn't Lie (but we can lend a hand)

Take a look through the lens, tell me what you see?

This simple phrase has been the number one, best advice given to me when it comes to photo taking. I am not a photographer. Many of you have left flattering remarks about my photos and I truly appreciate that. Those of you who are professional photographers will realize the truth in my statement, I am not a photographer.

My art is gardening. Photography is a tool for me, a tool that I have grown comfortable with after much use but still a tool. Photographs are ways for me to share the beauty I see in the garden, a photographer would see the the beauty in the photograph itself.
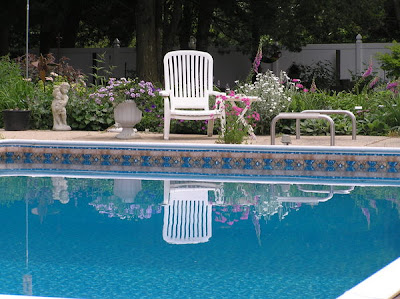
My husband Don is a much better photographer than I will ever be. When I first tried to take photographs in the garden he explained all kinds of things to me. Words I had never heard before and had no interest in retaining minutes after our conversation. One thing stuck though, when he asked me to look into the lens and tell him what I saw.

Of course I saw the pretty flower I was looking at, what else should I see? It took time before I saw more, there was a dead leaf in the corner, the label was half sticking out at the bottom, somebody had forgotten to dead head yesterday's bloom and so on. As I learned to really look into the lens, make my eye follow all four sides and see what else is in the photo, that's when the compliments started to come.

The photo above is one I like very much. Today I can sit here though and point out that if I had seen that weed bucket in the left bottom corner and the silver bird house pole, I could have moved the camera just a nudge to the right or zoomed in just a tiny bit more.

The webmaster for the American Hemerocallis Society, Tim Fehr is an awesome photographer. I was incredibly lucky to sit through one or two of his lectures on garden photography. Better yet, I got to follow along with him on a tour at Planting Fields Arboretum here on Long Island. He too gave me more tips than I wanted to retain, such as using a gray board and bouncing light and... well, that stuff flew right out of my head.

The tip Tim shared with me that stuck for all these years is the rule of thirds (I might have the words wrong but I'm sure of the concept). Split your photo into thirds. Three lines across and three lines down. Instead of always centering your photo right in the middle, try to compose it so your focus falls along one of those third lines. I really like this concept and find those photos much more relaxing, not so "in your face".

Above you can see my idea of the rule of thirds with the incredibly photogenic Iris cristata 'Alba'.

Of course, some plants just scream for that "in your face shot" as this Echinops did for me. I like to call it "Horton, are you in there?" Listen to your plant material if it talks to you.
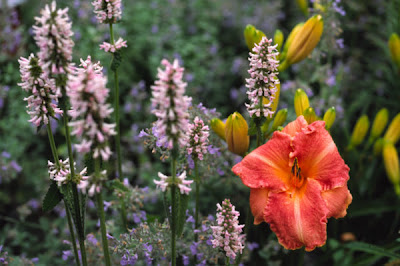
Here you can see an example again of the rule of thirds. My subject was the delicious daylily 'Jeanne Fitton'. One of my all time favorite perennials, Stachys monieri was glad to help along as a backdrop.

For years I shot all my photos with our trusty Nikon N2020 but it was the Micro Nikkor 55 mm 1:2.8 lens that did the magic. I held out as long as I could but slide film was getting harder to come by and so was the processing. Finally we went digital, our first camera didn't last long and I'm several years into my simple Olympus camedia (chosen for it's powerful zoom).

I have never gotten the same feel from these digital images. Oh yes, there are some benefits. The incredible blues in the above photo of a Columbine were never possible with that slide film.

Besides capturing the blues, I can now crop, edit, blur, clarify and manipulate my photos in ways that were previously unimaginable. (Nepeta siberica above is another favorite perennial here).
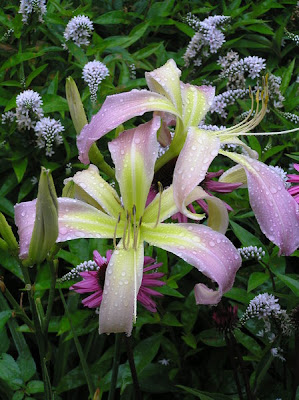
Although I'm not a photographer, I do have to thank my camera. It was while looking through that lens that I fell in love with so many things. I was blinded for so many years, only focused on daylilies and yet the photos that captured the feeling I was looking for always seemed to have companion plants mixed in. My heart was trying to tell my head something, it just took a while before I listened. For you folks in warmer climates, the daylily above, 'Kathryn June Woods' is as etheral as daylilies come.
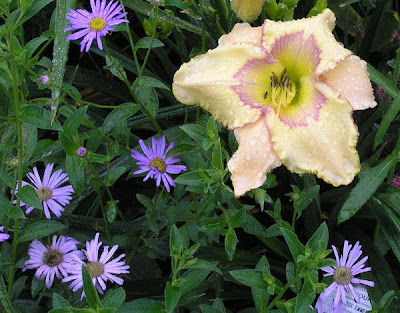

Just to be fair, I'll finish with not one but two tips. First comes the photography tip. If at all possible, don't shoot your photos in full sun. If you have no choice, try to stay away from the hottest hours of the day, 11:00 - 3:00. In fact if it's raining too hard to work in the garden, throw on a slicker, bare your feet and get out there with a big golf umbrella and your camera.

The last tip, is for those northerners looking for rock solid hardy daylilies that are fantastically beautiful too, check out Karol Emmerich's cultivars at Springwood Gardens, located in rural Minnesota, these beauties (like 'Cast Your Net' above) are top notch.

Imagine that, me giving photography lessons. Instead of "photography for dummies" I should have called this post "photography by dummies".

Take back the Shed!


This photo is one of the oldest slides of our garden. It was the inspiration for our name, "Old Country Gardens".

When we moved here, I was already bitten by the gardening bug but I knew nothing about garden design. I saw all this land out back and thought the only way it could be planted was like a farm, everything in rows. Our yard no longer looks anything like this but I'm so glad I have this old photo to remind me of back then.


When we first moved here, I stored my gardening tools in our two car garage. We never had one of those before but somehow managed it fill it immediately on move-in day. To this day we can only squeeze one car in there.

It wasn't long before I knew we needed a shed. I was wasting precious time every day running back and forth from the gardens out back to the garage every time I needed a tool. When Don agreed that we needed a shed, I drove him crazy looking for the perfect one. It had to have windows, window-boxes for me to plant and I insisted on the door being centered.


The color of the shed alone was a whole project, I drove around town looking at other sheds and comparing different colored wood stains. My darling shed had curtains on it's windows before my daughters bedrooms had curtains, how could I resist those lace valences with picket fences on them.

The inside was another project. We bought flooring from the remnant section, cabinets and a counter top too. We didn't get to choose colors but I was so happy with what we got. Little did I know what a light colored floor would look like after a rainy day in the garden.


This is what the interior looked like the first few years. My daughters were children then and they'd spend days inside playing board games or house. I couldn't get them to make their bed but they'd sweep the shed in an instant.

Recently I tried to find a new photo of my shed. If you've read my recent posts you'll know how upset I was when our neighbor ruined the wooden fence and installed this hideous white vinyl elephant. Maybe that was the beginning of the problem. Maybe it was the day my mom was giving the shed a spring cleaning and let out a shriek when she found a mouse.


What ever it was, I started to avoid my shed. It became a place where I opened the doors, threw something inside and ran off again as fast as possible. The plant material around the shed has filled in so beautifully yet the only recent photos I found were two taken in July of 2006 during a garden tour here. My youngest daughter Emily took photos of people in the garden and the shed was captured at the same time. You can see here that the window boxes had rotted off by then. I miss them!


This last photo shows the shed out back. By the summer of 2006 the interior was totally ignored, the only enjoyment I was getting was working on the landscape around that shed. This brings me to the title of my post. It's time to "take back the shed"!

As soon as our snow melts, I'm going to get in there and empty out all those mouse filled birdhouses. The mice must think it's mouse condominium heaven in there..."ooh look honey, which house would you like? The one with the peaked roof or the one that looks like an old mans face...".

Really, I am!

Sunday, February 24, 2008

Get the Word Out!


There's something about gardeners. I find them to be amazingly "sharing" kind of people. Maybe it's because of the bounty we find in our own back yards but I rarely come across a gardener who isn't willing to share their beauty with others.

For this reason, I love to go to garden lectures and symposiums. There is just so much sharing going on! I do lecture too, I love every minute of it and always tell people that by the end of the day it's a wonder I can fit my fat head back through the door. Of course, it only takes a minute at home when pffffttttt, like a popped balloon sailing around the room my head quickly deflates back to it's normal pinhead size.

Garden clubs have always fascinated me, I've visited dozens if not hundreds now and each one is unique in it's own way. This whole new world though of blogging has me blown away. Not a TV person anyway, I can sit here and click and before you know it I'm off to another land picking up some of the most amazing gardening tips.

Being a part of a whole gardening group at Blotanical makes the process a thousand times better. I can easily cruise a whole bunch of gardening blogs at one time. A click here, a tap there and I've found a new thread to set me off running. The other night I found The Cheap Vegetable Gardener's site with a wonderful post on "make your own homemade newspaper pots", that had me clicking more to see Muddy Clogs and minutes later I was running around my house gathering up everything I needed to make my own pots (and they are just dandy too).

As a gardener, nothing would make me happier than to have all the people around me become gardeners. To help this happen, I find that I'll talk to just about anybody as long as the topic is gardening related. This Thursday I begin teaching Gardening at our High School's adult education program. I can't begin to tell you how exciting this is to me.

A number of years ago I decided I needed a business card to hand out. I was trying to incorporate some of my own photos but I hated cropping them that small. The smallest I was willing to cut was the size of a bookmark...DING DING...that's how the idea began. I made bookmarks with my favorite photos on the front and my own information on the back. Best yet, I had just given my husband a laminater for Father's day and I laminated those bookmarks.

Yesterday I needed to make a new batch so I'd have them to hand to my new students. I also thought I'd bring a few along today as I visited the Long Island Horticultural Society. This time I recorded the whole process so I can share it with all of you.

The top photo shows the beginning process. I crop a photo and paste four of them on a blank page. This is done on my computer on an old print shop program but I'm sure you can do this with other programs too. Once I have them lined up the way I like them, I print out the page. I use card stock now but have used plain old computer paper too.

The next step is to print out the back side. You want to trial this on a blank piece of paper first until you get the spacing right. There's no sense wasting all those color pages, ink just costs too much. Put what you want on the back. If you click on this photo you will see the following:

Old Country Gardens
featuring Melanie's Perennials
(my e-mail address)
http://melaniesoldcountrygarden.blogspot.com
Visit us at www.blotanical.com

That last line was new, I'm so excited to add Blotanical to my bookmarks.

Once you've printed both front and back, it's time to cut them into individual pieces. I like to use a paper cutter for this as it makes it easy to keep straight lines.

Now it's time to place each piece into a laminating sleeve. Our laminator is a "hot" one. At first they will look very cloudy to you, I thought they'd turn out awful at first but don't worry.

From here on there will be some glare in each photo as the laminating paper is quite shiny and bounced back any light in the room. Here you see me feeding the sheet into the laminator.

And, here you see me helping it slowly come out the other side. I've found that it helps to hold it both on the in feed and the out feed. As it comes out it is still hot and easily bendable. You don't want it to bend, you want to help it stay flat.

Time now to cut them apart. This laminating stuff is so strong that I don't like to do this part. I usually get my husband to do it for me as I need to make several passes with the razor knife before the pieces will seperate. Please note, I'm not cutting this on my kitchen table (although we could use a new one...) There is a glass cutting board under everything. We use the back side of the glass cutting board since it is nice and smooth and the razor doesn't seem to damage it.

After I cut the first few I remember I bought one of those cutting boards at our local craft store so I scrounged around the basement and found it. It works even better because I can see those straight lines through the plastic.

If you try this at home, remember slow and steady won the race. This is not a project you want to hurry through, you will just waste lots of time, paper, ink and take a chance on cutting or burning yourself. Don't let this discourage you, it's quite simple as long as you stay relaxed and don't rush.

I'd love to hear how you spread the word, Gardening is Amazing!

P.S. I was just about to hit "publish post" when my husband told me that he uses the paper-cutter to cut them into individual pieces. Duh!

Saturday, February 23, 2008

Houston, We have a problem...

Last night I was taking advantage of quiet time and computer access time (those of you with teenagers in the house will understand that part). I was going through my photos, making sure I had backed up all the files to our external hard drive. It was just a year ago we learned the hard way to make sure everything is backed up.


One file I really hadn't looked at in a long time was labeled "Plant Sale". Once a year I hold a plant sale with the extra plants in my garden. I have a thing for propagation, especially when it comes to perennials. I might not have even realized this was my "niche" until I read Dave's post at The Home Garden Apparently Dave too is a propagation nut although he's more into cuttings and I'm into division and seeds.

Anyway, back to the topic here. I was looking at these photos and noticed an alarming similarity with many of them. It looks like some of the plants have gotten a bit too pushy in the perennial beds. Right now the worst culprit is the deliciously purple Lysimachia ciliata 'Firecracker'.

My gardening buddy Chris had given me a piece of this plant and I loved the foliage so much that I begged for more pieces. I should have been worried when she looked at me with furrowed forehead and asked me if I was sure I wanted to put it in more places. Silly me, I now have purple foliage coming up in almost every garden here.


Do you ever have those moments where you think "what the heck was I doing"? It was bad enough that I had Sedum 'acre' in one location so "what the heck was I doing" when I actually put it in other places too? Now I have to admit that this one spot along the driveway is almost perfect for it. I say almost perfect because every year just before it blooms our lawn guys hit it with the weed-wacker.


As a confessed propagation nut, I love to let my perennials seed around. I laugh when I read something that tells you to deadhead your plants because the seedlings differ from the parent. Hello, that's how they find new cultivars!

Up until two years ago we were blessed to have a top notch mail order nursery just a few miles away from here. Roslyn Nursery had all kinds of unusual and hard to find plants. Since my other obsession is collectoritis I would find a plant I loved and keep buying every new one that came available. One of those plants was Tradescantia (spiderwort). Ok, I heard somebody out there groan. These hybrid Tradescantias are wondeful, many are well behaved and stay in a clump, I never had one of them seed around either. That was until 'Sweet Kate' came to my garden.

Tradescantia 'Sweet Kate' has the most shocking chartreuse foliage. It's like a beacon and although it's 200 feet from my house it's one of the first things my eye travels to in early spring. After a year or two I noticed that 'Sweet Kate' liked to have babies, and those babies were popping up all over the place. Propagation me said "ooh, lets wait for those babies to bloom and see if something cool shows up". Well, nothing cool has shown up but I suddenly find myself with lots and lots of thug-like Tradescantia's all over the place and not one of them has chartreuse foliage.


Corydalis lutea is a perennial I adore. First of all, it was a pass-along-plant here. A gardening friend Judy Rocco gave it to me when I had first moved to this house. Actually, I had to twist Judy's arm a bit to get a piece, she told me I'd be sorry if this plant began to seed around. Since I planted my Corydalis in a dry rock wall, it took a few years before I had enough for myself. By then Judy had died of cancer and I thought of her every time my daughter and I waited for the school bus. You see, Emily loved the little yellow blooms of Corydalis and she'd tickle them because she thought she thought they looked like they were laughing.

Every year we potted up Corydalis for our sale and it always sold out early in the morning. Two years ago my mom went crazy potting it up and I was afraid there'd be none left. Sure enough last year the week before the sale I could hardly find any and I had none for sale. Several customers were specifically looking for it and I had to disappoint them. It turned out that there was actually as much Corydalis as ever, it just was a late spring and two weeks after the sale I had carpets of Corydalis in my shade gardens.


The biggest problem with perennials that spread by seed is that you can't always control where that seed will germinate. Who am I kidding, you have no control at all. The combination of Iris cristata 'Alba' and Corydalis lutea is one of my utmost favorites so I try to grow them close together. Aren't they pretty in this picture? Now scroll upwards to the photo above this one. See that Corydalis foliage? It's seeded itself right in the middle of my best clump of Iris cristata 'Alba' and guess who's winning the battle.

Looks like this year I'll be digging that clump up and replanting all the Iris cristata (hopefully it's still there). The Corydalis probably won't survive that process. I find them finicky to re-pot and when we pot them up for sale we take nice big chunks of soil so the roots aren't even disturbed.


Violets were only in one corner of my garden. I have these basic purple ones and some lovely pink ones. This year I'm also going to try to get a piece of 'Freckles' from my friend Gianna. The first year we had a sale here I was amazed at the customers who pointed to the violets in the garden and asked why I didn't have any for sale. At that time I dug willingly from the beds during the sale so I was popping violets out like crazy.


Still, I find it hard to believe that people want to buy many pots of violets and I always pot up too few. This year I'll try hard to pot up 15-20 pots. It's not like there won't still be violets in my garden next year.

This last photo is a picture of one of my sales beds as I was preparing for the sale. This was our "shade bed". This year I'm trying to get as much done in advance as possible. We try to have a few handouts to give away and every year I print up a few more color photos and laminate them. If you have a stunning color photo of a plant you are guaranteed to sell out of it. Better yet, have a stunning photo of a plant combination and all those plants will sell out.

That reminds me, we're out of colored ink. Since everything is covered with snow outside, maybe I'll head to Staples to get some ink and spend some time with my printer.

One question for all of you. If you have your blog listed with Blotanical, could you tell me how to find out what my feed URL is so I can have them include my posts in their "picks" area?

Bye!

Friday, February 22, 2008

The Fence Post


There are many reasons for wanting to install a fence on your property. One common reason is security. You could be telling the world "Stay out, this is mine" or you could be telling your children or pets "Stay in, this is where you belong".

We installed fencing the first summer we moved here. One side of our property backed a home that was facing a busy road. At the time our girls were 6 and 2 years old and we feared that they might wander off and quickly be in the middle of traffic.

We didn't know much about landscaping back then but our house and the property seemed rustic and countrified so we went with a wooden stockade fence. At that time, vinyl fences were not available around here so they weren't even a consideration. We had three estimates and actually chose the highest one because it was for the best quality cedar fence. This fence has been here 11 years now and shows no sign of nearing the end of it's life.


Our home is almost 50 years old but was built to resemble a 200 year old Williamsburg colonial style house. The front is covered in stone, so is our inside wall in the living room. There is a breezeway between the house and the garage although the foundation is one piece for the whole structure.

We loved the breezeway and I was especially in love with the little wild cottage garden I grew in front of it. Over the years though we noticed a major flaw with having an open breezeway. Strangers would come down our driveway to go to the front door, but if they saw us in the backyard they felt quite comfortable just walking through the breezeway and coming to speak with us. That doesn't sound so bad, except when you find you are in your swimming pool with two little children and a strange man walks up to you to try to sell you steaks off the back of his truck. Get out!!!


Early last year we had a fence installed to close off our breezeway. Instead of something disappearing from view, I wanted something that visually said "stop here". White stops your eye, dark colors fade from view so a white fence was what was needed to form a visual barrier. A month later we had masons come in and replace the old patio and front walkway. It was an amazing transformation. You can click on my label "hard-scape" to see last year's post showing our new masonry.


In our town there is a law that states you must fence in a swimming pool. You can fence just the pool or the whole property. Every year there are tragic drownings because children have access to those swimming pools. We absolutely hated this white fence the previous owners put around our pool when we moved here but it was a necessity with small children around. What a relief when the girls grew up and we could remove this fence. Our yard still meets code because it is entirely enclosed in fencing but at least we could get rid of this big white zit (blemish) in our yard.

We had friends who moved to a house a year after we moved here. They too had a pool in the yard but it wasn't fenced in separately. I urged them to reconsider a white fence and instead suggested that they put a black fence around the pool. If I had a photo I'd share it with you, the black fence just totally disappears from your view when you look out at their yard.


If you haven't been able to tell yet from my previous posts, I really hate white vinyl fence. Ok, maybe hate is a strong word. I don't mind the white vinyl picket fencing but when it comes to white vinyl stockade, yes, I hate it!

Today it's snowing outside and other than a day like today, there's no time in nature that one sees a huge expanse of white. In the winter those white vinyl fences look so cold and stark to me. In the summer they're even worse, totally not a part of nature. The huge expanse of white grabs your eye and takes away from anything else in that area.

Above you are looking at a bed we built along the back of our pool (once the white fence was removed) and behind it you can see our cute shed. Did your mind even look at that wooden stockade fence? Probably not.


Here's a picture taken from the same exact spot just a year later. What grabs your eye? Could it be that unnatural expanse of white? Does that white fence do anything at all for the rustic country garden? Scroll down to my last post and take a good look at how "white" that fence is just two years later. The whole selling point on those vinyl fences is that they are maintenance free. It sure doesn't look maintenance free to me unless you want to look at long expanses of moldy plastic.


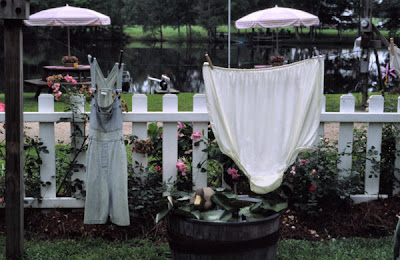
Sometimes a fence is installed for decorative purposes. White picket fences in front of cottages are perfect examples of that reason. I adore white picket fences but they just wouldn't suit my home. Here you can see a perfect white picket fence outside the little cottage at Westbury Gardens. Be still my beating heart, I just love this sight.

Here at our old country home, the decorative fence along the front property line was a split rail fence. This fence was already old when we moved here 11 years ago and has finally begun to fall apart. Still, I would like to replace it with something very similar. Maybe a slightly more formal post and rail style with three cross bars but still in natural wood finish.

Up the street my friend Gianna also has split rail along her property line. It's just enough to mark the boundaries of her front yard and not so strong a viewpoint that it pulls your eye away from her delightful sea of blooms.

I guess what I'm trying to say is that I don't think fencing should be the main focal point in a landscape. The house, garden, shed, or something else should be what draws your eye.

Yesterday as I drove through town I really looked hard at all the types of fences people have. Whether the house was an old victorian, a typical 1950's high ranch or even a modern angular house, I never saw a place where a white vinyl fence added to the beauty of the home.

Googling fences brought me countless beautiful images. If you know of a photo that would add to this thread, please post the link to it in the comments section. I'll be on the look out for more photos too.

It's still snowing outside, time for a walk.

Bye,
Melanie

Teaser 2

This first photo is for Marie at http://heimdalhagen.blogspot.com/ in Norway. I know she likes dogs so I thought I'd share a shot of my labradoodle (yellow lab crossed with standard poodle) that I took about an hour ago. Calie the wonder-doodle was overjoyed this morning when we woke up and found something new outside.

Ah ha, this is what happens when you brag on www.blotanical.com, GardenJoy4Me sends you snow for daring to brag about your crocus blooms. I have a sneaking suspicion that flowergardengirl (Anna) had a hand in it too because she wanted me to get off that beach and back to posting. Well Anna, the beach was freezing cold, silly me, it is still February! We barely stood there for a minute and then went back inside.

So this morning I woke up to find the weather guesserologists were at it again. The prediction was 3-6 inches of snow in New York city and areas north and west. 1-3 inches were forecast for areas south and east of the city and last I checked Long Island is east of New York City. Right now there are 4-5 inches on my picnic tables out back and it's still falling.

The good news? I'll be inside much of the day and can get to work on my post about fences. Now to forewarn all of you, part of that post will be a rant on how I feel about these new white vinyl fences. Hopefully I don't hurt too many feelings, I too was intrigued when they first came on the market but oh my, I just can't stand them anymore.

The photo above shows my own garden shed. It's just darling, the only problem is it's got mice in it. I wouldn't mind so much if they wore a bell around their neck and I could hear them before they darted in front of me. Instead, I bang on the door for a minute before opening it in hopes they all run and hide (I even yell out loud for them to do exactly that).

Look at that hideous white vinyl fence behind my lovely country shed. Come on, we live in an area with 1 acre minimum zoning, most of the properties are heavily treed. Yes, we are a suburb of New York City but it looks pretty countrified around here. What could be more unnatural than a huge expanse of white plastic? This fence runs for 400', turns for 100' and runs 400' more. To make matters worse, these people put the fence up along with the house next to them who put the exact same fence up. I look out of my bedroom window and see two yards fenced in with this incredibly fake looking product.

Take one more look, see that green mold growing on the fence? The big selling point here is that these fences are maintenance free. Ah ha, instead of painting them you have to spray them with something to remove the mold.

This last photo shows an uninspiring shot of my compost area. I wasted an hour looking for a good photo of this area taken during summer months. It's quite lovely then so I don't know why I can't find a photo.

A number of years ago I was on one of my walks when I saw a landscaping company ripping these pier pilings out of a beautiful landscaped home. It was the same company who mowed our lawn at the time so I asked what they were doing. A new home owner had moved in and the wanted all those pier pilings removed and replaced with stone. I asked what was going to happen to the pier pilings and was told that a number of truck loads had already been hauled off to the dump. WHAT!!! The last truck load was dumped at my house instead, I wish I had gotten the others too.

We rolled those pilings to the back corner, dug a shallow trench with our handy Mantis tiller and popped those babies in. My daughters and their friends played countless hours back there in their pirate fort/hogwarts castle/alien outpost and what ever else. It turned out to be a great "fence" for decorative purposes by hiding my compost heap.

By the way, you can see the 6' stockade wooden fence we installed 11 years ago, it's still in great condition and has never needed a single minute of maintenance. All the way in the right corner you'll see a tiny section of that white vinyl fence. Well, to call it "white" isn't fair, it's pretty dingy if you ask me.

Back in a bit, time for breakfast and then I'll be working on the fence post.

Thursday, February 21, 2008

Teaser


This photo of this darling shed was taken in Michigan in LaVere's garden.

Now imagine you had to add a fence for some reason or other. A fence in front of this shed and a fence in back of this shed. Think hard, think about what you want to accent and how the final result is going to look. Think feeling, heavy or light.

I'm off to have lunch with a friend and a possible walk on the beach (her house is on the beach) but temps are still below freezing. When I come back I'll begin my thread on fences for your house and garden.

Bye!

Wednesday, February 20, 2008

Heavenly Hosta 2

Yesterday I promised I'd show some of the Hosta I have in sunny places. Keep in mind that my gardens are on Long Island (just east of New York City) so this might not work for the deep southern locations. Also, even though we have 1.3 acres, we are surrounded by tall trees so there is no such thing as direct sun from sun-up to sun-down.

On the left is Hosta 'Spritzer' which I bought at a daylily auction (yes, I know...) it turned out to be one of the best auction buys I've ever made! The plant to the right is Pulmonaria 'Raspberry Splash'. This location gets full sun from early in the morning until at least 2:00pm and then quite a bit of filtered light after that. The Pulmonaria wilts a little in the summer on a hot day but quickly recouperates in the late afternoon.

Here you can see the same spot from another angle, what this photo doesn't show is that there are lots of daylilies planted in this area too. You can see how the chartreuse color in Hosta 'Spritzer' shines like a beacon in the garden. Also in the back drop (still getting 5 hours of morning sun) is Hosta 'Blue Angel' which is now so massive that I need to divide it this spring.

One last shot of this area, this is in July and while full sun is shining here (I hate how full sun washes out the colors in photos). Hosta 'Spritzer' now has a few holes, either slug damage or broken twigs from the dying Cedar tree just north of this bed (my neighbors tree of course). But it's still hanging strong and adding lots of foliage interest to this garden.

Hosta are also great perennials for planters that you plan on leaving outside for years. Clay pots will shatter here but cement planterss or the new fake ones make it through the winter just fine. This spot also only had morning light but last year we increased the front stoop by quite a bit and even further out with more direct sun, the Hosta did fine.


My all time favorite Hosta so far is this cultivar 'Sea Fire'. I've been back to Schmidt's farm dozens of times and never saw it for sale again. This year I'm going to bite the bullet and split my clump but I don't think I'll offer any for sale. I'll plant all those pieces in nice rich sunny soil with lots of yummy composted manure. Maybe in a few years somebody will be able to talk me into sharing a piece :-)

This last shot is out along our back property line. As I mentioned yesterday, right after this was planted the neighbors took out most of their trees (they live south of us so those trees cast shade into our yard). This garden is 5 years old now and this photo is 2 years old. I really have to get in there and divide like crazy this year!

Take a careful look at that white fence in the back drop. My next post will be about choosing the right kind of fence for your garden. I wish somebody would have explained that to me in the past as we've made mistakes here too.

Oh yes, I saw my first crocus bloom today! What a surprise!!! Photos to come soon :-)

Bye,
Melanie